Create & Print Bluelines From A Pencil Sketch
In this tutorial we’ll walk through the step-by-step process of turning a scan of pencilled artwork into a blueline file, which you can print and ink over. There are many reasons you might want to create bluelines of your pencil drawings to ink. Blueline is easy to drop out in Photoshop so you don’t have to bother with erasing away your pencils after inking. I already draw in blueline pencil, but I always scan my pencils before inking them in case I mess something up (like an ink spill!). That way, I can just print out my pencils again and start over.
-
The first thing I’m going to do after I scan in my original pencils is to go to Image>Mode>Grayscale and get rid of the color information. This is because later we are going the change the mode to Duotone. You will see below that “Duotone” is grayed out and not an available option to select. That’s because my file still has color information.

-
Next I’m going to go to Image>Adjustments>Levels to adjust the contrast in my image and make sure my pencil lines are emphasized and knock out some of the lighter process lines.

-
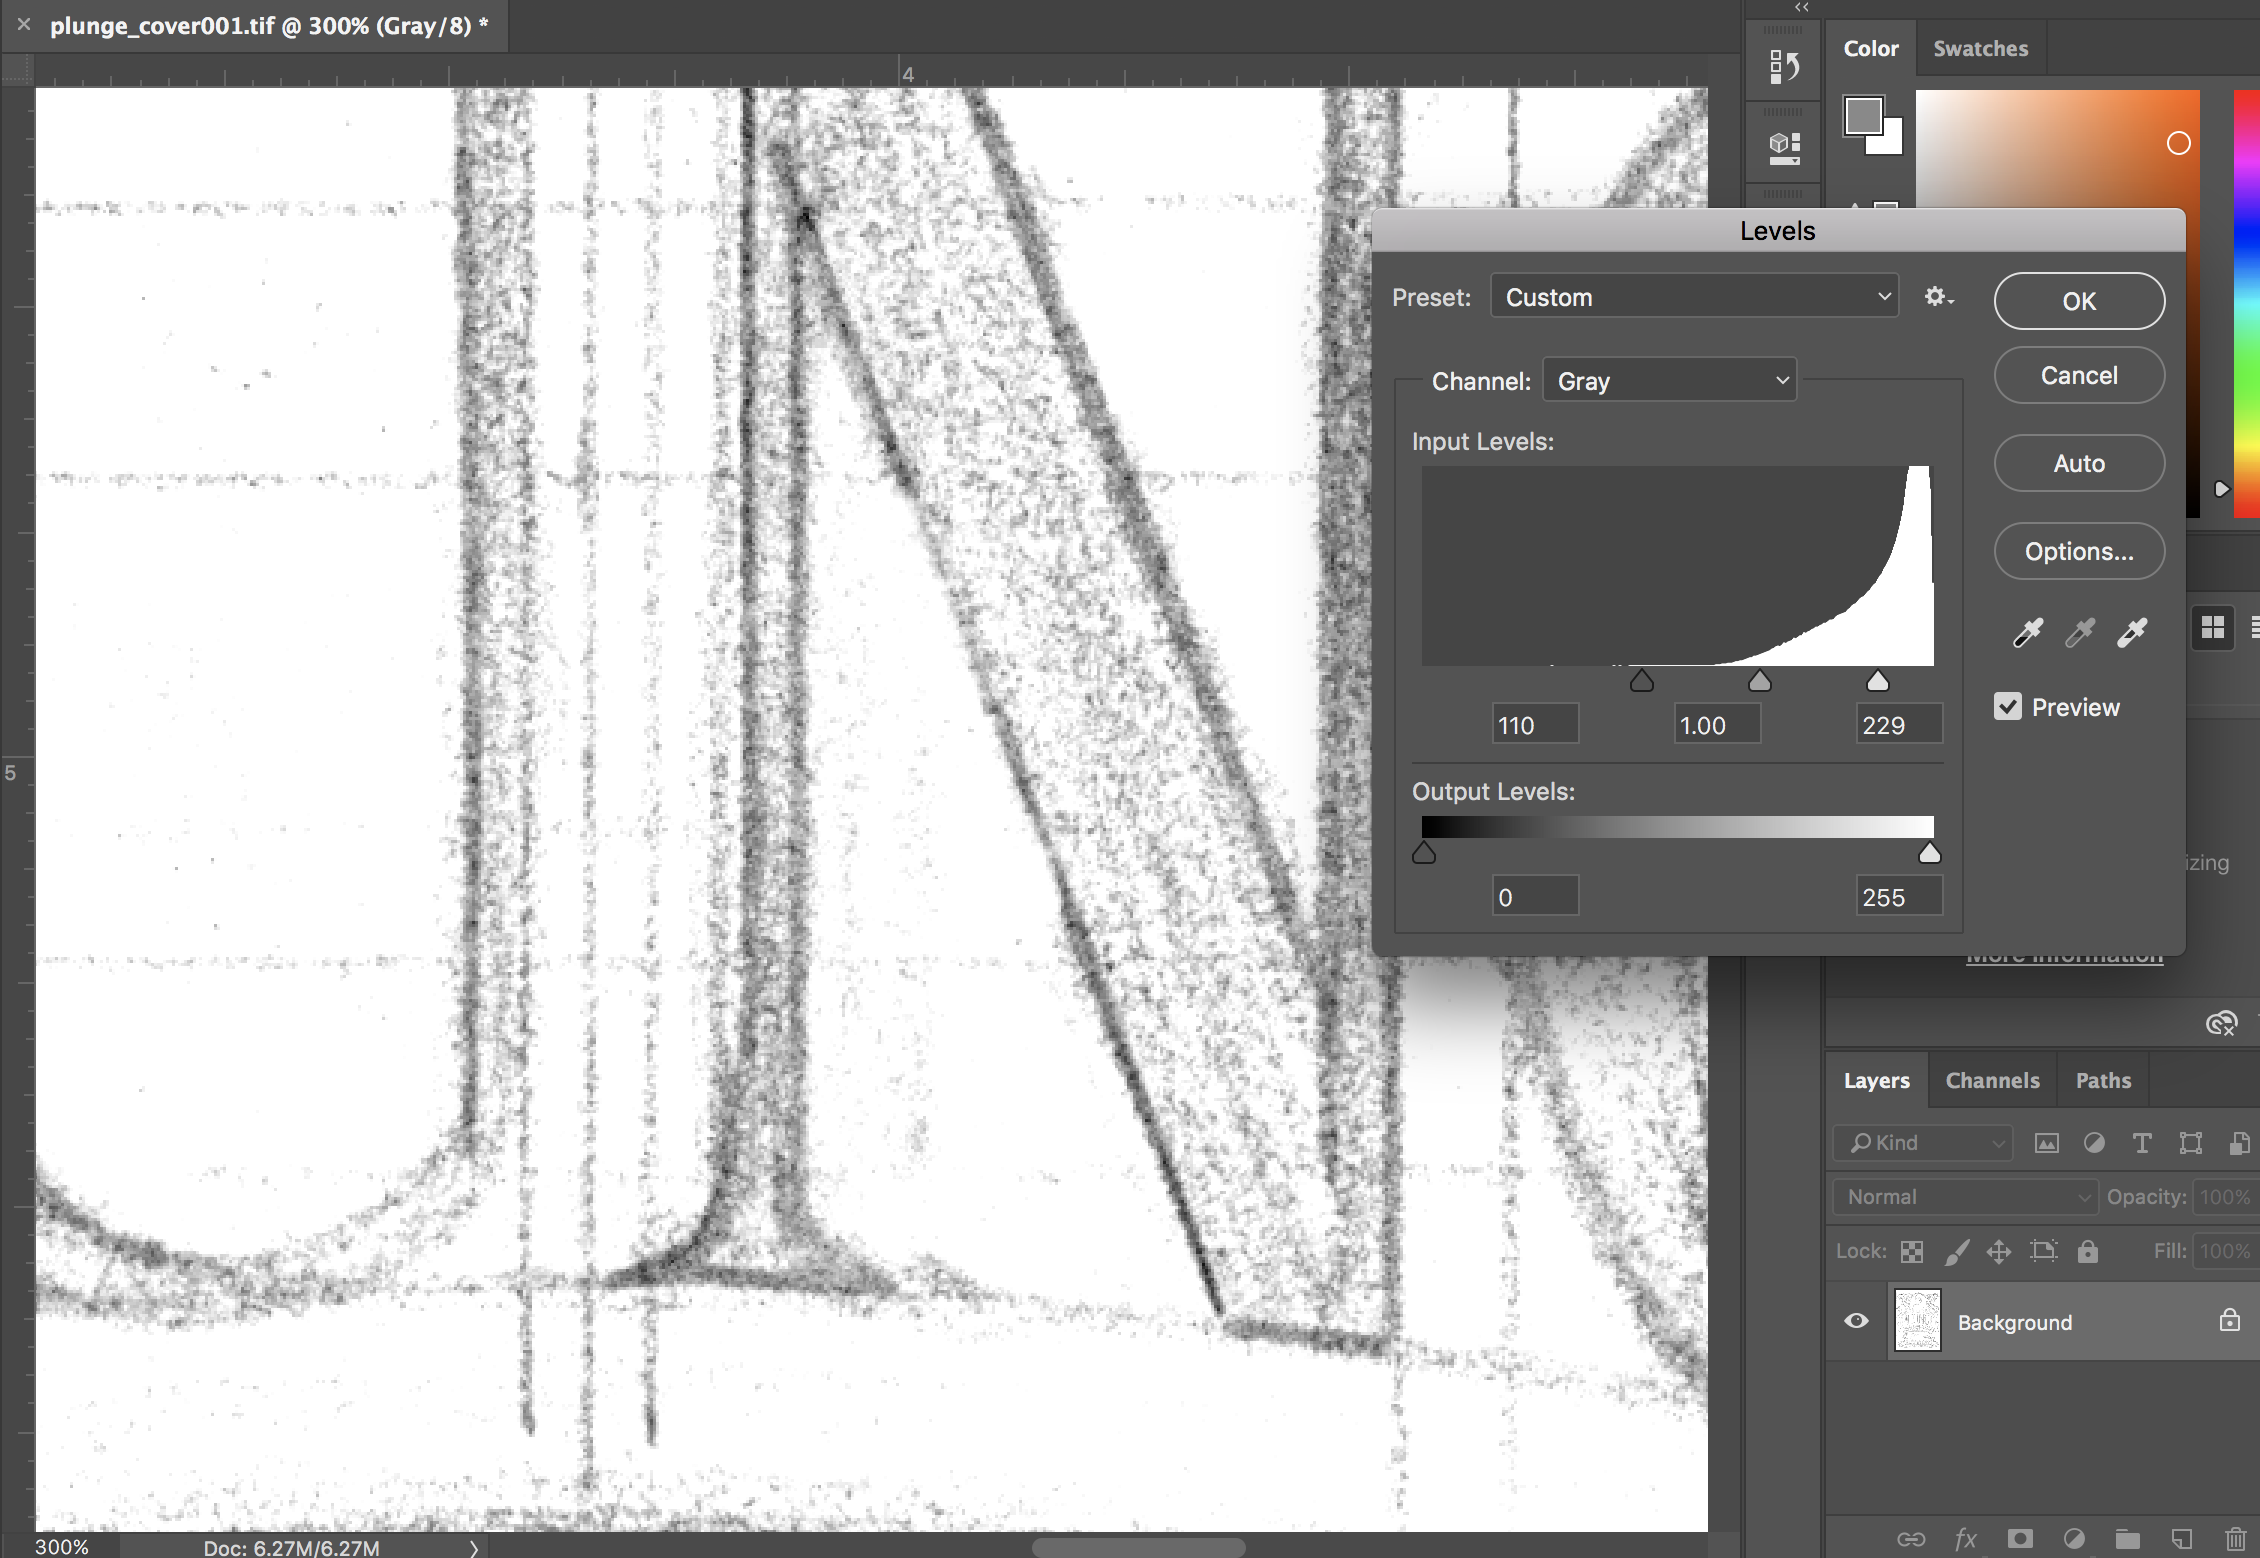
That will open a box that looks like this:

-
I want the pencil lines to really show up, so I’m going to slide the cursor on the left over to the right to make the lines darker.

-
I also want the paper to be white, so I’m going to nudge the cursor on the right slightly over to the left. Just a bit.
-
Now I’m going to go back to Image>Mode and select Duotone.

-
This will bring up a window that looks like this:

-
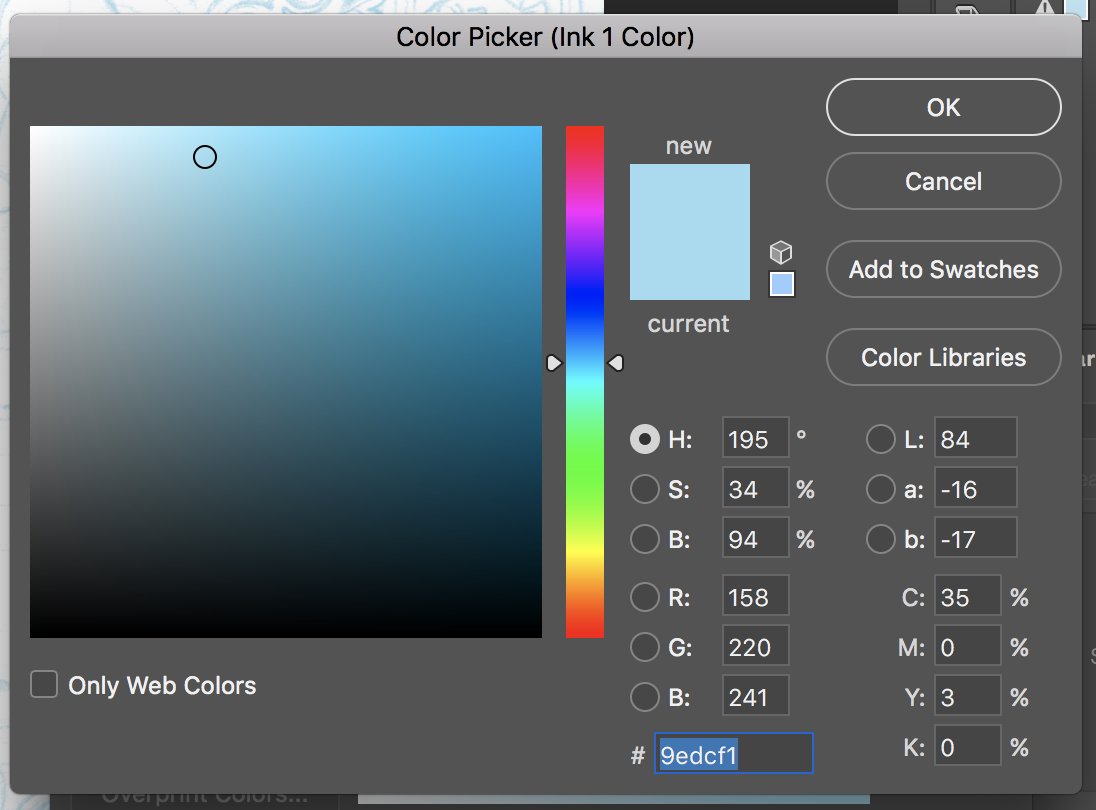
Your duotone box will probably already have a default selection that is black. We are going to change that to a very light blue. Double click on the black box to bring up the Color Picker.

-
Adjust the vertical slider and choose your color.
-
This color should be light blue, containing no Magenta (M) or Black (K). A little bit of Yellow (Y) is fine, but obviously it will mostly be Cyan (C).

-
Name your new color. If you’re doing this on a personal computer, it will still be there the next time you create bluelines and you should just be able to select it.

-

-
Now we’re going to print! I usually print my bluelines on 11″x17″ bristol board. Depending on your project, it may be best to print on a different size or type of paper.

-
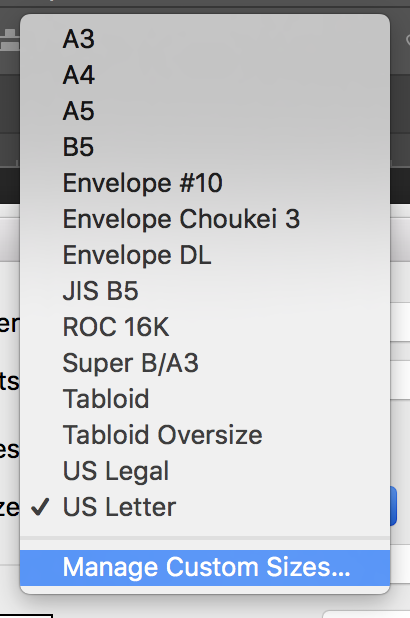
Because I am printing on 11″x17″ paper, I will need to change the paper size in the print settings. The default setting will probably be “US Letter.”

-
On a Mac, you’ll be able to click on the dropdown for the paper size and select the size of paper you’ll be printing on. If your paper size is not listed, select “Manage Custom Sizes.”
-
This will bring up a new window where you can create a new paper size for your print settings.

-
I’m setting mine to 11″x17″ and naming it “11×17” so that I can easily find it in the settings next time I’m printing.

-
Print your bluelines out and ink over them! When you’re finished you can scan your inks and follow the steps in the Cleaning Up Scans in Photoshop tutorial to drop the bluelines out.